Установка Request Tracker 4.2.11 на Ubuntu 14.04.1
Invite pending
Цель данной статьи показать все этапы установки и настройки Request Tracker 4.2.11 (далее RT) в качестве системы учета заявок пользователей (HelpDesk). Установка будет осуществляться на ОС Ubuntu Server 14.04.1. Процесс установки ОС Ubuntu Server 14.04.1 я описывать не буду так как статья не о том.
Установка:
Настраиваем файл hosts:
Установка и настройка NTP:
Добавляем сервера NTP:
После добавления NTP серверов перезапускаем NTP:
#service ntp restart
Установка MySQL:
Запускаем скрипт инсталляции:
После запуска скрипта mysql_secure_installation необходимо утвердительно ответить на заданные вопросы. Первым делом будет предложено сменить пароль пользователя root базы mysql (не путать с системным пользователем).
Необходимо ввести пароль root.
Удаление анонимного пользователя, нажимаем Y:
Отключаем возможность для root логинится к базе mysql удаленно, нажимаем Y:
Удаляем тестовую базу:
И в завершении перезагружаем таблицу привилегий:
Перезапускаем MySQL:
#service mysql restart
Установка web сервера apache2:
Установка RT:
Создаем системного rt пользователя и группу:
Добавляем пользователя www-data (Apache) в rt группу:
Скачиваем последнюю версию RT (на момент написания статьи, актуальная версия — 4.2.11 от 07.05.2015), распаковываем и переходим в директорию:
Настройка RT скрипта:
Perl CPAN.pm:
RT Perl зависимости:
Команду «make fixdeps» необходимо вводить пока не появятся все зависимости. Возможно несколько раз!
У меня в процессе установки так и не установился модуль:
Plack::Handler::Starlet ...MISSING
В таком случае его необходимо установить вручную:
Прежде, чем запустить инсталляционный скрипт RT, команда «make testdeps» должна отображать наличие всех модулей со статусом «found»:
Приступаем непосредственно к установке RT:
Настройка RT осуществляется путем добавления значений в конфигурационный файл RT_SiteConfig.pm:
(RT_Config.pm содержит значения конфигураций по умолчанию, его править нельзя)
Добавляем строку:
Инициализируем RT в базе данных:
Настройка Apache для RT:
Настраиваем редирект с http на https для всех входящих соединений:
Далее создаем конфигурационный файл:
Редактируем конфигурационный файл:
Включаем SSL и fcgid модули:
Включаем сайт RT:
Проверяем конфигурацию Apache:
Перезапускаем Apache:
Настройка конфигурации для начала работы:
Далее необходимо установить пароль для пользователя базы данных RT (rt_user).
Требуется, чтобы мы добавили пароль в конфигурационный файл RT (это строка в RT_SiteConfig.pm «Set( $DatabasePassword, 'Pa$$w0rD');») и также установили его в MySQL:
Перезапускаем MySQL:
По умолчанию размер запроса (Заявки) — 128 Кб., что очень мало.
Увеличиваем до 10 Мб.:
Перезапускаем Apache:
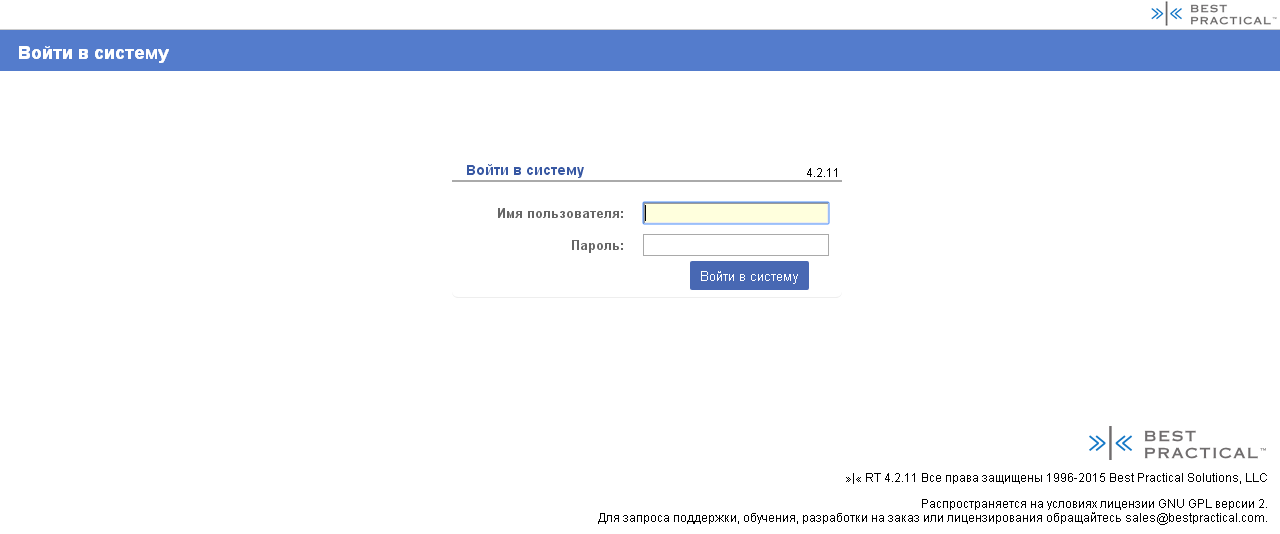
На этом установка RT закончена. Заходим в RT:
rt.domain.ru
Логин: root
Пароль: password
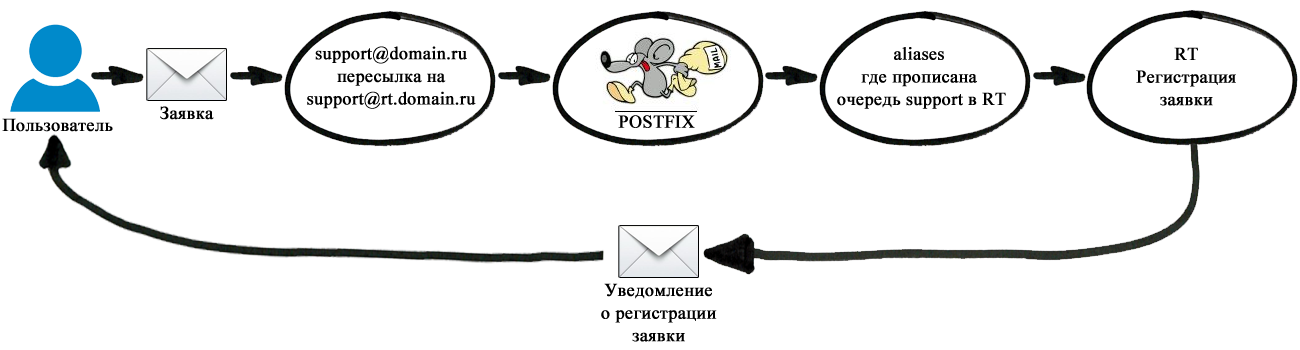
Подача заявки в Request Tracker через почтовое сообщение:
Так как подавать заявки пользователям через web интерфейс не очень удобно и оперативно, далее будем реализовывать такую схему:
Установка postfix:
Создаем конфигурационный файл:
где relayhost — это ваш почтовый сервер.
Так как у меня на почтовом сервере используется ssl, то добавляем сертификаты (TLS parameters).
Не забываем на DNS сервере прописать mx запись для rt.domain.ru.
В RT создаем очередь support. (Администратор->Очереди->Создать)
Где необходимо указать адреса: адрес для ответа и адрес для комментариев:
адрес для ответа: support@rt.domain.ru
адрес для комментариев:support-comment@rt.domain.ru
Далее необходимо внести очереди RT в /etc/aliases:
Создаем пустой файл aliases.db:
После внесения изменений в /etc/aliases, необходимо обновить /etc/aliases.db командой:
Создаем файл mailname:
и добавляем строку:
Шаблоны:
Что бы приходило уведомление о регистрации заявки — добавляем шаблон «Autoreply».
Ещё полезный шаблон — «Resolved», информирует о решении заявки.
Далее создаем пользователей в RT и назначаем права в очереди.
Если пользователей много то вам поможет плагин «RT::Authen::ExternalAuth».
Всё, система учета заявок пользователей готова.
Установка:
Настраиваем файл hosts:
# nano /etc/hosts
127.0.0.1 localhost
192.168.1.2  rt.domain.ru  rt
Установка и настройка NTP:
#apt-get install ntp
Добавляем сервера NTP:
#nano /etc/ntp.conf
...
# Specify one or more NTP servers.

# Use servers from the NTP Pool Project. Approved by Ubuntu Technical Board
# on 2011-02-08 (LP: #104525). See http://www.pool.ntp.org/join.html for
# more information.
server ns1.domain.ru
server ns2.domain.ru
После добавления NTP серверов перезапускаем NTP:
#service ntp restart
Установка MySQL:
#apt-get install mysql-server mysql-client libmysqlclient-dev
Запускаем скрипт инсталляции:
#mysql_secure_installation
После запуска скрипта mysql_secure_installation необходимо утвердительно ответить на заданные вопросы. Первым делом будет предложено сменить пароль пользователя root базы mysql (не путать с системным пользователем).
Необходимо ввести пароль root.
Enter current password for root (enter for none):
OK, successfully used password, moving on...
Удаление анонимного пользователя, нажимаем Y:
Remove anonymous users? [Y/n] y
Отключаем возможность для root логинится к базе mysql удаленно, нажимаем Y:
Disallow root login remotely? [Y/n] y
Удаляем тестовую базу:
Remove test database and access to it? [Y/n] y
- Dropping test database...
- Removing privileges on test database...
И в завершении перезагружаем таблицу привилегий:
Reload privilege tables now? [Y/n] y
Перезапускаем MySQL:
#service mysql restart
Установка web сервера apache2:
#apt-get install make apache2 libapache2-mod-fcgid libssl-dev libyaml-perl libgd-dev libgd-gd2-perl libgraphviz-perl
Установка RT:
Создаем системного rt пользователя и группу:
#adduser --system --group rt
Добавляем пользователя www-data (Apache) в rt группу:
#usermod -aG rt www-data
Скачиваем последнюю версию RT (на момент написания статьи, актуальная версия — 4.2.11 от 07.05.2015), распаковываем и переходим в директорию:
#cd
#wget http://download.bestpractical.com/pub/rt/release/rt.tar.gz
#tar xf rt.tar.gz -C /tmp
#cd /tmp/rt-*
Настройка RT скрипта:
#./configure --with-web-user=www-data --with-web-group=www-data --enable-graphviz --enable-gd
Perl CPAN.pm:
#sudo cpan
CPAN.pm requires configuration, but most of it can be done automatically.
If you answer 'no' below, you will enter an interactive dialog for each
configuration option instead.

Would you like to configure as much as possible automatically? [yes] <enter>
...
Would you like me to automatically choose some CPAN mirror
sites for you? (This means connecting to the Internet) [yes] <enter>
...
cpan[1]> o conf prerequisites_policy follow
cpan[2]> o conf build_requires_install_policy yes
cpan[3]> o conf commit
cpan[4]> q
RT Perl зависимости:
#make testdeps (если зависимостей будет не хватать, то часть будет помечена как MISSING)
#sudo make fixdeps
#make testdeps (повторяем, что бы убедиться, что всё ок)
Команду «make fixdeps» необходимо вводить пока не появятся все зависимости. Возможно несколько раз!
У меня в процессе установки так и не установился модуль:
Plack::Handler::Starlet ...MISSING
В таком случае его необходимо установить вручную:
#wget http://ubuntu.biz.net.id/ubuntu/ubuntu/ubuntu/ubuntu/pool/universe/s/starlet/starlet_0.24.orig.tar.gz
#tar zxvf starlet_0.24.orig.tar.gz
#cd /tmp/rt-4.2.11/Starlet-0.24/
#perl Makefile.PL
#make install
Прежде, чем запустить инсталляционный скрипт RT, команда «make testdeps» должна отображать наличие всех модулей со статусом «found»:
#make testdeps
/usr/bin/perl ./sbin/rt-test-dependencies --verbose --with-mysql --with-fastcgi
perl:
    >=5.10.1(5.14.2) ...found
users:
    rt group (rt) ...found
    bin owner (root) ...found
    libs owner (root) ...found
    libs group (bin) ...found
    web owner (www-data) ...found
    web group (www-data) ...found
CLI dependencies:
    Text::ParseWords ...found
    Term::ReadKey ...found
    Getopt::Long >= 2.24 ...found
    HTTP::Request::Common ...found
    Term::ReadLine ...found
    LWP ...found
CORE dependencies:
    Storable >= 2.08 ...found
    Encode >= 2.39 ...found
    Crypt::Eksblowfish ...found
    Module::Versions::Report >= 1.05 ...found
    List::MoreUtils ...found
    Errno ...found
    DBI >= 1.37 ...found
    Devel::StackTrace >= 1.19 ...found
    HTTP::Message >= 6.0 ...found
    Text::Password::Pronounceable ...found
    Devel::GlobalDestruction ...found
    Time::ParseDate ...found
    IPC::Run3 ...found
    Tree::Simple >= 1.04 ...found
    HTML::Scrubber >= 0.08 ...found
    HTML::Quoted ...found
    Sys::Syslog >= 0.16 ...found
    Mail::Mailer >= 1.57 ...found
    Data::GUID ...found
    HTML::Mason >= 1.43 ...found
    HTML::Entities ...found
    LWP::Simple ...found
    Symbol::Global::Name >= 0.04 ...found
    DateTime::Format::Natural >= 0.67 ...found
    Plack >= 1.0002 ...found
    File::Glob ...found
    Class::Accessor >= 0.34 ...found
    Text::Wrapper ...found
    Regexp::Common::net::CIDR ...found
    Log::Dispatch >= 2.30 ...found
    HTML::FormatText::WithLinks::AndTables ...found
    DateTime >= 0.44 ...found
    CGI::Emulate::PSGI ...found
    Text::Quoted >= 2.07 ...found
    Regexp::IPv6 ...found
    CGI >= 3.38 ...found
    CSS::Squish >= 0.06 ...found
    DateTime::Locale >= 0.40 ...found
    CGI::PSGI >= 0.12 ...found
    Apache::Session >= 1.53 ...found
    Date::Extract >= 0.02 ...found
    Digest::SHA ...found
    HTML::Mason::PSGIHandler >= 0.52 ...found
    MIME::Entity >= 5.504 ...found
    Locale::Maketext::Lexicon >= 0.32 ...found
    Module::Refresh >= 0.03 ...found
    Role::Basic >= 0.12 ...found
    Digest::base ...found
    File::Temp >= 0.19 ...found
    Date::Manip ...found
    Locale::Maketext >= 1.06 ...found
    HTML::RewriteAttributes >= 0.05 ...found
    Text::Template >= 1.44 ...found
    CGI::Cookie >= 1.20 ...found
    Scalar::Util ...found
    XML::RSS >= 1.05 ...found
    Text::WikiFormat >= 0.76 ...found
    File::Spec >= 0.8 ...found
    DBIx::SearchBuilder >= 1.65 ...found
    File::ShareDir ...found
    Regexp::Common ...found
    Digest::MD5 >= 2.27 ...found
    HTML::FormatText::WithLinks >= 0.14 ...found
    Mail::Header >= 2.12 ...found
    Locale::Maketext::Fuzzy >= 0.11 ...found
    Time::HiRes ...found
    Email::Address::List ...found
    Net::CIDR ...found
    JSON ...found
    UNIVERSAL::require ...found
    Email::Address >= 1.897 ...found
    Plack::Handler::Starlet ...found
DASHBOARDS dependencies:
    URI::QueryParam ...found
    URI >= 1.59 ...found
    MIME::Types ...found
FASTCGI dependencies:
    FCGI::ProcManager ...found
    FCGI >= 0.74 ...found
GD dependencies:
    GD::Text ...found
    GD ...found
    GD::Graph >= 1.47 ...found
GPG dependencies:
    File::Which ...found
    PerlIO::eol ...found
    GnuPG::Interface ...found
GRAPHVIZ dependencies:
    IPC::Run >= 0.90 ...found
    GraphViz ...found
ICAL dependencies:
    Data::ICal ...found
MAILGATE dependencies:
    Pod::Usage ...found
    LWP::UserAgent >= 6.0 ...found
    Crypt::SSLeay ...found
    Getopt::Long ...found
    Net::SSL ...found
    LWP::Protocol::https ...found
    Mozilla::CA ...found
MYSQL dependencies:
    DBD::mysql >= 2.1018 ...found
SMIME dependencies:
    String::ShellQuote ...found
    File::Which ...found
    Crypt::X509 ...found
USERLOGO dependencies:
    Convert::Color ...found

All dependencies have been found.
Приступаем непосредственно к установке RT:
#make install
Настройка RT осуществляется путем добавления значений в конфигурационный файл RT_SiteConfig.pm:
(RT_Config.pm содержит значения конфигураций по умолчанию, его править нельзя)
#nano /opt/rt4/etc/RT_SiteConfig.pm
Добавляем строку:
Set( $rtname, 'rt.domain.ru');
Инициализируем RT в базе данных:
#make initialize-database
/usr/bin/perl -I/opt/rt4/local/lib -I/opt/rt4/lib sbin/rt-setup-database --action init --prompt-for-dba-password
In order to create or update your RT database, this script needs to connect to your  mysql instance on localhost (port '') as root
Please specify that user's database password below. If the user has no database
password, just press return.

Password: <your_MySQL_root_password>
Working with:
Type: mysql
Host: localhost
Port:
Name: rt4
User: rt_user
DBA: root
Now creating a mysql database rt4 for RT.
Done.
Now populating database schema.
Done.
Now inserting database ACLs.
Granting access to rt_user@'localhost' on rt4.
Done.
Now inserting RT core system objects.
Done.
Now inserting data.
Done inserting data.
Done.
Настройка Apache для RT:
Настраиваем редирект с http на https для всех входящих соединений:
#nano /etc/apache2/sites-available/000-default.conf
<VirtualHost *:80>
        # The ServerName directive sets the request scheme, hostname and port that
        # the server uses to identify itself. This is used when creating
        # redirection URLs. In the context of virtual hosts, the ServerName
        # specifies what hostname must appear in the request's Host: header to
        # match this virtual host. For the default virtual host (this file) this
        # value is not decisive as it is used as a last resort host regardless.
        # However, you must set it for any further virtual host explicitly.
        ServerName rt.domain.ru:80
        Redirect permanent / https://rt.domain.ru/

        #ServerAdmin webmaster@localhost
        #DocumentRoot /var/www

        # Available loglevels: trace8, ..., trace1, debug, info, notice, warn,
        # error, crit, alert, emerg.
        # It is also possible to configure the loglevel for particular
        # modules, e.g.
        #LogLevel info ssl:warn

        ErrorLog ${APACHE_LOG_DIR}/error.log
        CustomLog ${APACHE_LOG_DIR}/access.log combined
...
Далее создаем конфигурационный файл:
cp /etc/apache2/sites-available/default-ssl.conf /etc/apache2/sites-available/rt.conf
Редактируем конфигурационный файл:
#nano /etc/apache2/sites-available/rt.conf
<IfModule mod_ssl.c>
        <VirtualHost _default_:443>

# Request Tracker
ServerName rt.domain.ru:443
AddDefaultCharset UTF-8
DocumentRoot /opt/rt4/share/html
Alias /NoAuth/images/ /opt/rt4/share/html/NoAuth/images/
ScriptAlias / /opt/rt4/sbin/rt-server.fcgi/
<Location />
## Apache version < 2.4 (e.g. Debian 7.2)
#Order allow,deny
#Allow from all
## Apache 2.4
Require all granted
</Location>
<Directory "/opt/rt4/sbin">
SSLOptions +StdEnvVars
</Directory>

                # Available loglevels: trace8, ..., trace1, debug, info, notice, warn,
                # error, crit, alert, emerg.
                # It is also possible to configure the loglevel for particular
                # modules, e.g.
                #LogLevel info ssl:warn

                ErrorLog ${APACHE_LOG_DIR}/error.log
                CustomLog ${APACHE_LOG_DIR}/access.log combined
Включаем SSL и fcgid модули:
#a2enmod ssl fcgid
Considering dependency setenvif for ssl:
Module setenvif already enabled
Considering dependency mime for ssl:
Module mime already enabled
Considering dependency socache_shmcb for ssl:
Enabling module socache_shmcb.
Enabling module ssl.
See /usr/share/doc/apache2/README.Debian.gz on how to configure SSL and create self-signed certificates.
Module fcgid already enabled
To activate the new configuration, you need to run:
  service apache2 restart
Включаем сайт RT:
#a2ensite rt
Enabling site rt.
To activate the new configuration, you need to run:
  service apache2 reload
Проверяем конфигурацию Apache:
#apachectl configtest
Syntax OK
Перезапускаем Apache:
#service apache2 restart
Настройка конфигурации для начала работы:
#nano /opt/rt4/etc/RT_SiteConfig.pm
#Basic settings
Set( $rtname, 'domain.ru');
Set( $Organization, 'domain.ru');
Set( $Timezone, 'Europe/Moscow');
Set( $WebDomain, 'rt.domain.ru');
Set( $WebPort, 443);
Set( $WebPath, '');
Set( $DatabasePassword, 'Pa$$w0rD');
Далее необходимо установить пароль для пользователя базы данных RT (rt_user).
Требуется, чтобы мы добавили пароль в конфигурационный файл RT (это строка в RT_SiteConfig.pm «Set( $DatabasePassword, 'Pa$$w0rD');») и также установили его в MySQL:
#mysql -u root -p
Enter password: <your_MySQL_root_password>
Welcome to the MySQL monitor.  Commands end with ; or \g.
Your MySQL connection id is 46
Server version: 5.5.34-0ubuntu0.13.10.1 (Ubuntu)

Copyright (c) 2000, 2013, Oracle and/or its affiliates. All rights reserved.

Oracle is a registered trademark of Oracle Corporation and/or its affiliates. Other names may be trademarks of their respective owners.

Type 'help;' or '\h' for help. Type '\c' to clear the current input statement.

mysql> SET PASSWORD FOR 'rt_user'@'localhost' = PASSWORD('Pa$$w0rD');
Query OK, 0 rows affected (0.00 sec)

mysql> \q
Bye
Перезапускаем MySQL:
#service mysql restart
По умолчанию размер запроса (Заявки) — 128 Кб., что очень мало.
Увеличиваем до 10 Мб.:
#nano /etc/apache2/mods-available/fcgid.conf
<IfModule mod_fcgid.c>
  FcgidConnectTimeout 20
  FcgidMaxRequestLen 10000000

  <IfModule mod_mime.c>
    AddHandler fcgid-script .fcgi
  </IfModule>
</IfModule>
Перезапускаем Apache:
#service apache2 restart
На этом установка RT закончена. Заходим в RT:
rt.domain.ru
Логин: root
Пароль: password

Подача заявки в Request Tracker через почтовое сообщение:
Так как подавать заявки пользователям через web интерфейс не очень удобно и оперативно, далее будем реализовывать такую схему:

Установка postfix:
#apt-get install postfix
Создаем конфигурационный файл:
#nano /etc/postfix/main.cf
# See /usr/share/postfix/main.cf.dist for a commented, more complete versio$

# Debian specific: Specifying a file name will cause the first
# line of that file to be used as the name. The Debian default
# is /etc/mailname.
myorigin = /etc/mailname

smtpd_banner = $myhostname ESMTP $mail_name (Ubuntu)
biff = no

# appending .domain is the MUA's job.
append_dot_mydomain = no

# TLS parameters

smtp_tls_CApath = /etc/ssl/certs
smtpd_tls_cert_file=/etc/ssl/certs/ssl-cert-snakeoil.pem
smtpd_tls_key_file=/etc/ssl/private/ssl-cert-snakeoil.key
smtpd_use_tls=yes
smtpd_tls_session_cache_database = btree:${data_directory}/smtpd_scache
smtp_tls_session_cache_database = btree:${data_directory}/smtp_scache
# Uncomment the next line to generate "delayed mail" warnings
#delay_warning_time = 4h

readme_directory = no

myhostname = rt.domain.ru
alias_maps = hash:/etc/aliases
myorigin = /etc/mailname
mydestination = rt.domain.ru, rt, localhost.domain.ru, localhost
relayhost = host.domain.ru
mynetworks = 127.0.0.0/8 [::ffff:127.0.0.0]/104 [::1]/128
#mainbox_command = procmail -a "$EXTENSION"
#mailbox_size_limit = 0
#recipient_delimiter = +
#inet_interfaces = all
где relayhost — это ваш почтовый сервер.
Так как у меня на почтовом сервере используется ssl, то добавляем сертификаты (TLS parameters).
Не забываем на DNS сервере прописать mx запись для rt.domain.ru.
В RT создаем очередь support. (Администратор->Очереди->Создать)
Где необходимо указать адреса: адрес для ответа и адрес для комментариев:
адрес для ответа: support@rt.domain.ru
адрес для комментариев:support-comment@rt.domain.ru
Далее необходимо внести очереди RT в /etc/aliases:
#nano /etc/aliases
# See man 5 aliases for format
postmaster:    root

support: "|/opt/rt4/bin/rt-mailgate --queue Support --action correspond --ca-file /etc/ssl/certs/ssl-cert-snakeoil.pem --url https://rt.domain.ru/"
support-comment: "|/opt/rt4/bin/rt-mailgate --queue Support --action comment --ca-file /etc/ssl/certs/ssl-cert-snakeoil.pem --url https://rt.domain.ru/"
Создаем пустой файл aliases.db:
#nano /etc/aliases.db
После внесения изменений в /etc/aliases, необходимо обновить /etc/aliases.db командой:
#newaliases
Создаем файл mailname:
#nano /etc/mailname
и добавляем строку:
rt.domain.ru
Шаблоны:
Что бы приходило уведомление о регистрации заявки — добавляем шаблон «Autoreply».
Ещё полезный шаблон — «Resolved», информирует о решении заявки.
Далее создаем пользователей в RT и назначаем права в очереди.
Если пользователей много то вам поможет плагин «RT::Authen::ExternalAuth».
Всё, система учета заявок пользователей готова.